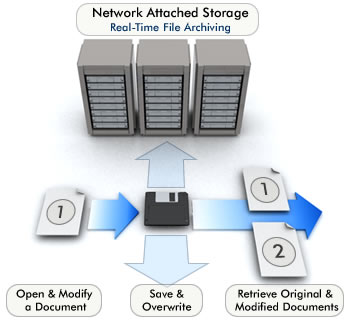
NAS (Network-attached storage) is one of a better Network Storage. There other backup methods like CD / DVD, USB external hard drive, tape backup, etc. The shared use of data can only be possible with an a network server or a NAS. A NAS or Network Attached Storage is an hard drive which autonomous and shareable connected to an Ethernet network. The advantage over a server is mainly the price, no user licenses to pay. By cons, a NAS does not share an application, such simultaneous access to a database.
The series of Maxtor Shared Storage II can be seen as an external hard drive that can be accessed via an Ethernet network 10/100/1GB (ie a NAS) and a simple external hard drive connected by USB (2 ports case). Its configuration is done using an HTML interface as a standard NAS. The only issue with ths is that it comes with software to install on Windows (2000 or XP) or Mac that allows you to automatically copy data to disk within certain time limits in advance.
Basically with all types of NAS device you will found a Power Switch, Power Connector, 2 USB 2.0 ports, RJ45 Ethernet 10/100/GHz and Safety lock. Todays device offer more than this. This type of device are relatively inexpensive compared to backups on DAT. I this sense, the Shared Storage do not directly take over the files on a given date. A manual backup can be still made.
The physical connection does not pose too many problems, connected to the grid via a transformer, connecting directly to a switch via a cable. The USB version will be seen later. The first step is installing the software supplied with the unit. The configuration starts after restarting the computer. Once restarted, you can configure the device via the backup software. It requires Internet Explorer 6.0.
There are two types of solutions that are proposed. There are two ways of this. First by using the time retrieved via Internet NTP servers which requires that the NAS is connected to the Internet, which is not too careful or by giving the time manually in the configuration.
Now the another step here allows to name the machine and a workgroup name to Windows default MSHOME. You can chose another also depending on the configuration of your own internal network . This is also where you can put a password for the Admin. In this case, the username Administrator is admin. This login is immediately requested. This completes the first part of the configuration. The setup wizard is also accessible via the main menu.
Now the further step will be to create users. Although this is not necessarily required, it is better the same as for users who connect their own computer. At this level, the new user was ultimately not really accessible. It will set records for grant some privileges. In the following, you must create a file containing the same name as the user.
The first step is to create the file. For each folder you created, access may be public or according to user access rights. The next part will help to give rights to users already created: full access, read-only or no rights.
For advance settings you can change the configuration of the NAS. From here you can manage the setting date and time can also be done with the installation Wizard to start. The Network setting can give a name and a working group to Network Shared Storage. The next window allows you to work with static IP or use a DHCP server. And then the maintenance tab where you can perform maintenance of the system uses the power management.


Leave a Reply